How to Authenticate with Azure Resource Management API with the Azure NodeJS SDK
I was recently working with the Azure Resource Management API in NodeJS for some work with Back I/O. I found the authentication process was rather poorly documented, so I thought I’d share my findings. This authentication method allows the application to access resources without a user credentials.
Azure NodeJS SDK
The Azure NodeJS SDK can be used to manage Azure resources. The API comes with two management flavours: Azure Service Manager (ASM), and Azure Resource Manager (ARM). ASM seems to be pretty closely related to the old Azure Management site, while ARM maps to the services in the new Portal.
When I started working with the API, I decided to avoid using anything labelled “Classic.” I didn’t really want to get the email that a service I was depending on was going to be deprecated and I needed to rewrite some piece of my application to continue operating. The ASM pieces of the NodeJS SDK couldn’t see the newer, non-classic, VM instances. Therefore, I needed to work with the ARM version of the API and SDK.
Authentication Documentation Confusion
The older, ASM SDK, uses certificates for authentication. You generate your own X.509 certificate, submit it to the public part to the old management portal, and authenticate with the private key use to generate the certificate. Complicated though this may be, it’s a familiar process for anyone used to generating SSH keys, or setting up TLS for web servers. So, this experience wasn’t going to help me with the ARM SDK.
ARM uses OAuth tokens for access, which you acquire from Azure Active Directory using a combination of application and/or user IDs, secrets keys, and passwords. I assembled the procedure to set this up from a variety of sources, including GitHub repositories, .Net-specific articles on MSDN, some Microsoft MVP’s blog posts, and more. I did my best to record my sources and will include links where I can. So this is where we get to the “How to…” of this article.
Setting up and Authorizing an Application in Azure AD
Bear with me folks, we need to get an OAuth Bearer token, and this process starts off with absolutely no code whatsoever. For this part we’re going to the Azure Active Directory Portal. I found my original instructions on how to do this on MSDN. I found while researching this article that this could all be done from the Azure Cross-Platform CLI. Maybe that’ll be my next post.
Head over to the Active Directory service page, select Applications and Add Application. If this is your first new Active Directory Application, Add Application will appear in the middle of the page, if you already have some listed, it appears in that dark strip at the bottom. I always forget to look down there for the add and save options because there’s such a gap between the content and that strip.
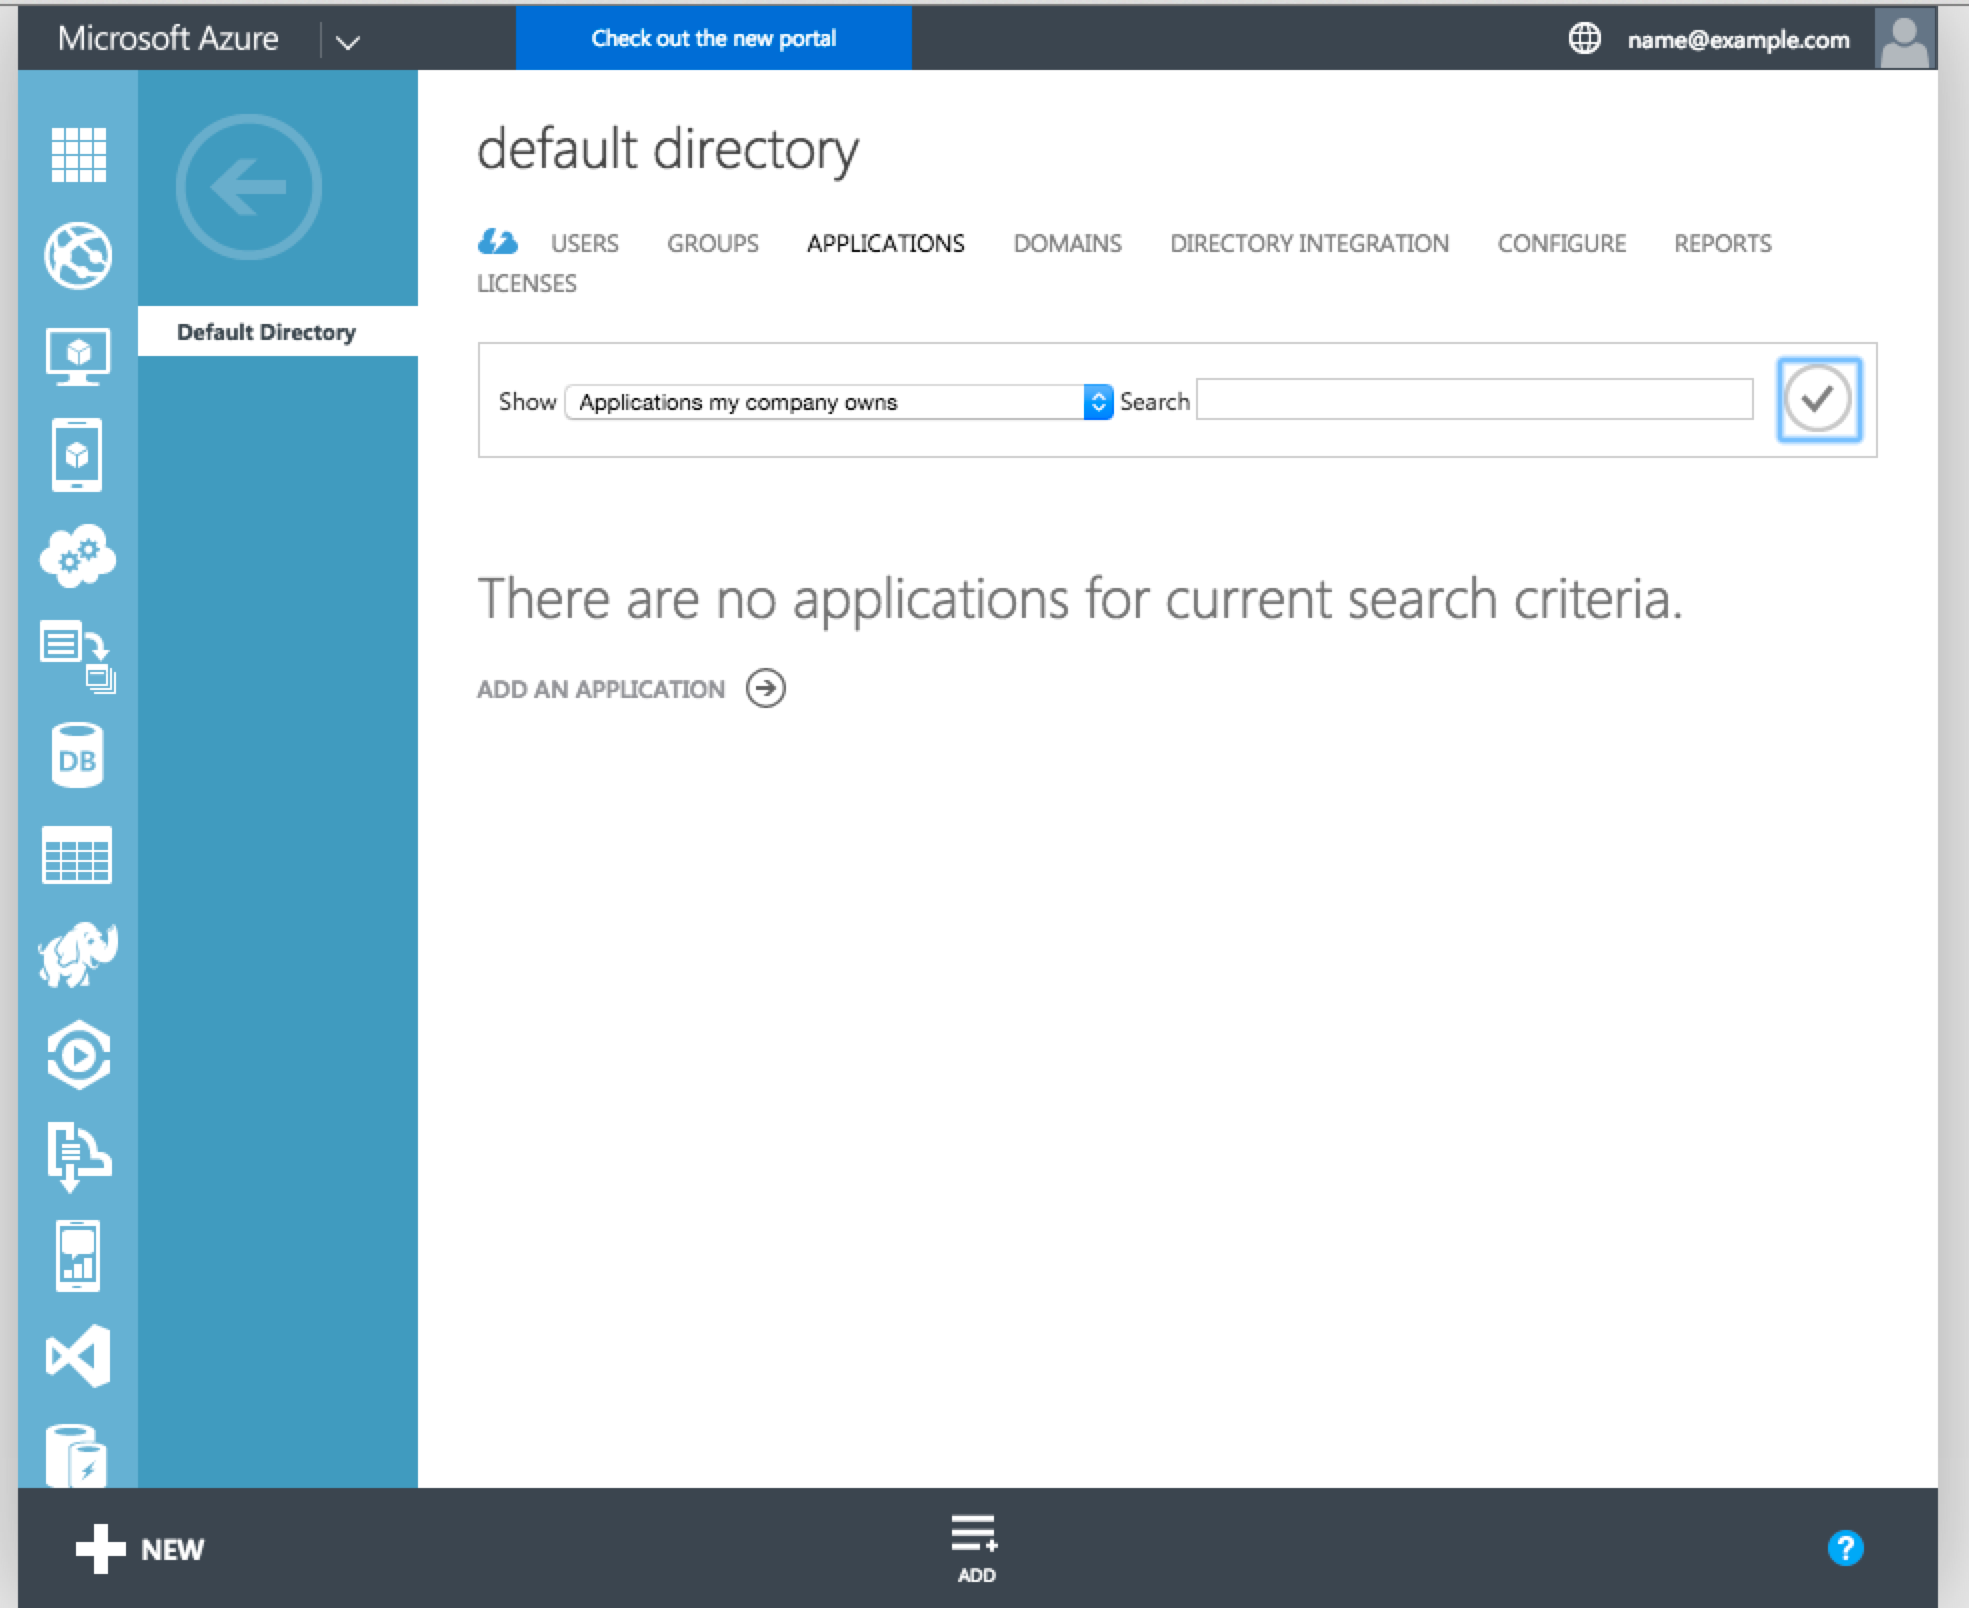 Azure Active Directory Applications page. Add Application is in the
middle and bottom.
Azure Active Directory Applications page. Add Application is in the
middle and bottom.
 Next, select add an application my organization is developing.
 Give your app a name, and select Web Application.
You’ll be asked to pick between a Web Application and Native Client Application. As far as I have gathered, the difference between the two is how the OAuth Authorization flow will work. Later, we’re going to set this up so we can access the resources without user credentials, so I don’t think this really makes a difference in this case.
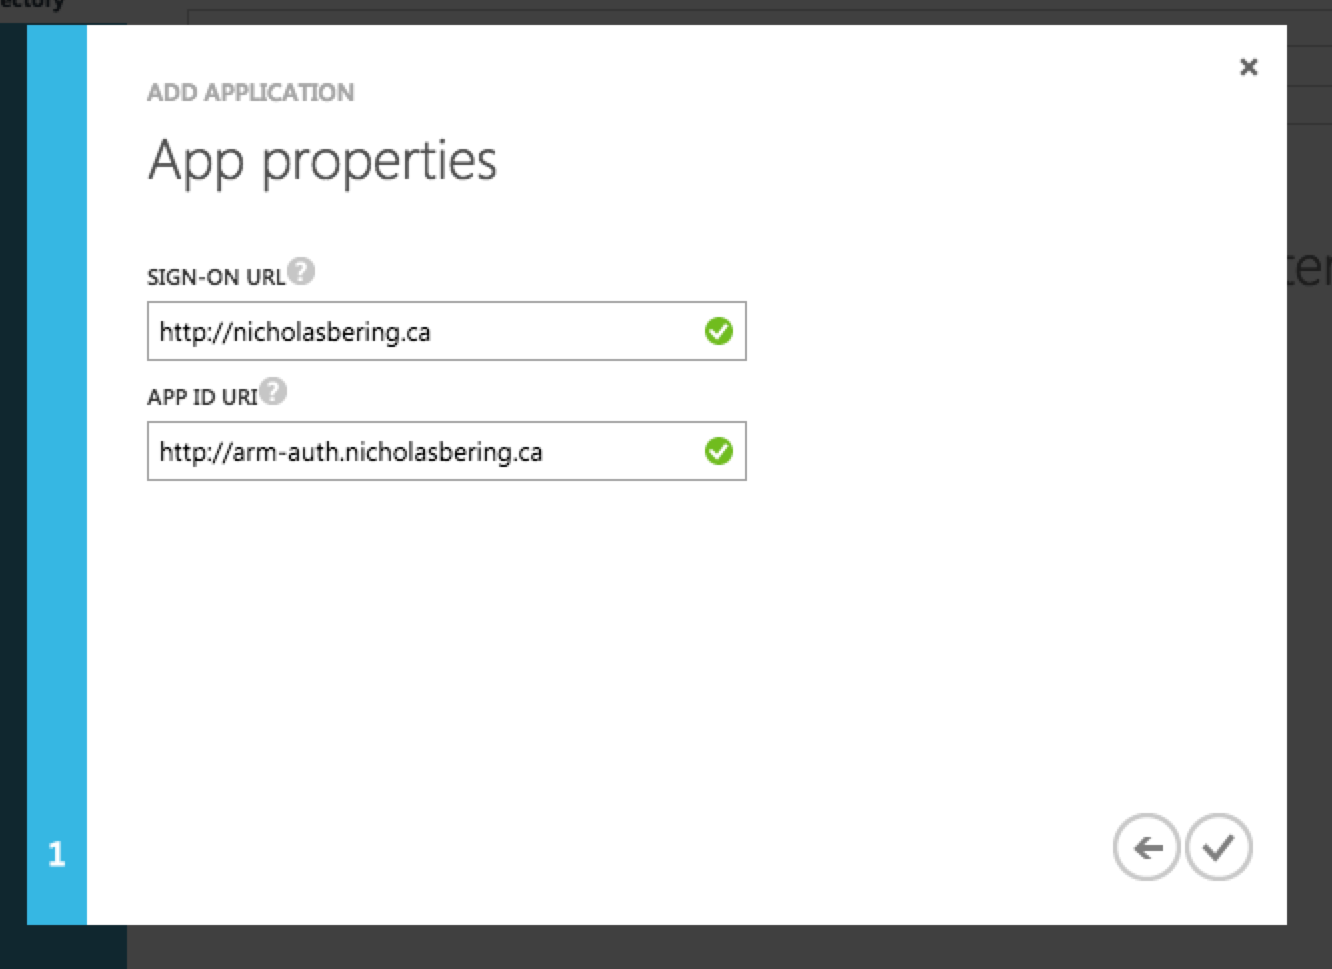 Set Sign-on URL and App ID URI.
Again, because the application will not require user credentials later, the Sign-on URL is basically meaningless, but I would probably at least pick a URL you control.
App ID URI is a unique URI-formatted identifier for your application. It is purely used as an ID so pick whatever you want. Again, I would at least choose a domain under your control, but the full domain name doesn’t need to exist.
 Set Ok, our new Azure AD Application is ready. Select configure.
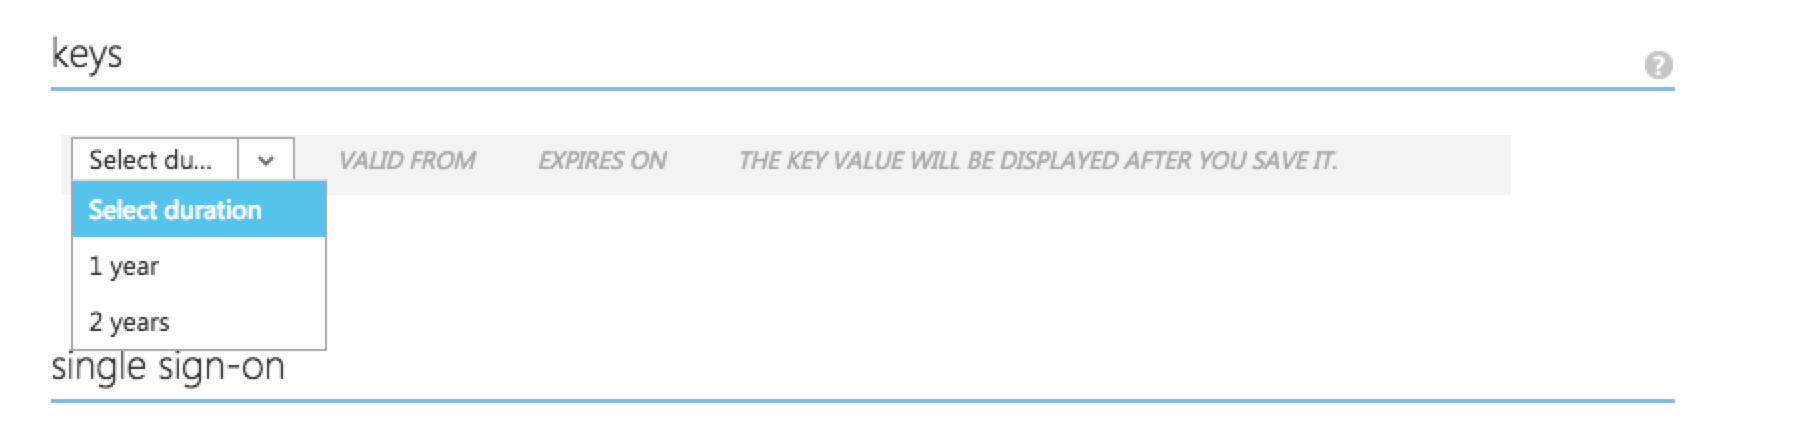 Add a new application key.
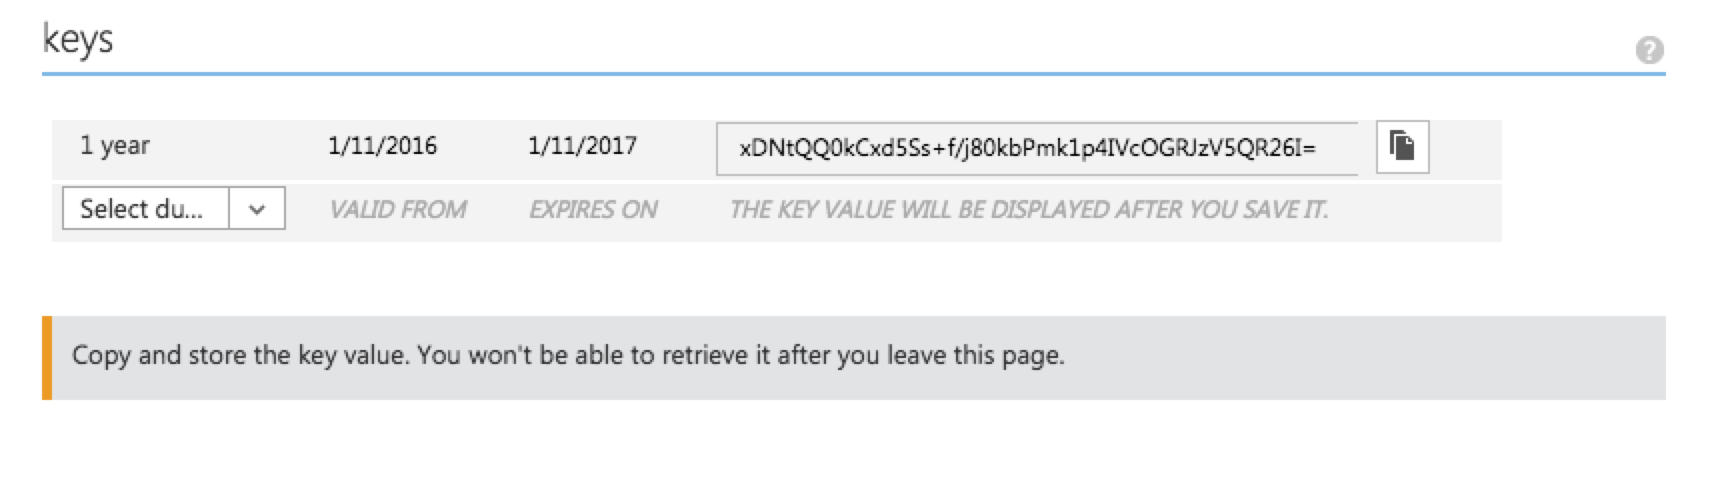 Don't forget to save your key. If you do forget, you'll need to generate
a new one.
Don't forget to save your key. If you do forget, you'll need to generate
a new one.
Before you leave the page, make sure you’ve copied your application key, as well as the application ID. We’ll be needing them later.
Role Based Access Control (RBAC)
After the above steps are completed, we now have an Azure AD Application and a key to use for authentication. Now we need to grant the application permission to access Azure Resources.
Azure’s Role Based Access Control (RBAC) allows us to assign access privileges for ARM directly to the application. There’s no option for this in the old management portal though, so we’re going to need to move over to the new management portal. I found the instructions for this process in the azure documentation, but I’ll repeat it here.
The fancy term for what we’re doing is assigning a role to a “service principal.” Basically, we’re just assigning a role that would normally be given to a user, to an application. We can scope the service principal’s role to a resource, or service provider. In my case, I’m just going to scope the permissions to the whole subscription, because I’m just playing around and don’t want to have to do this for every service I want to access. This is mostly bad security practice, but you can tighten up the security once you know exactly which resources the app will require.
 Select the subscription, and click the little Users icon in the
properties pane.
Select the subscription, and click the little Users icon in the
properties pane.
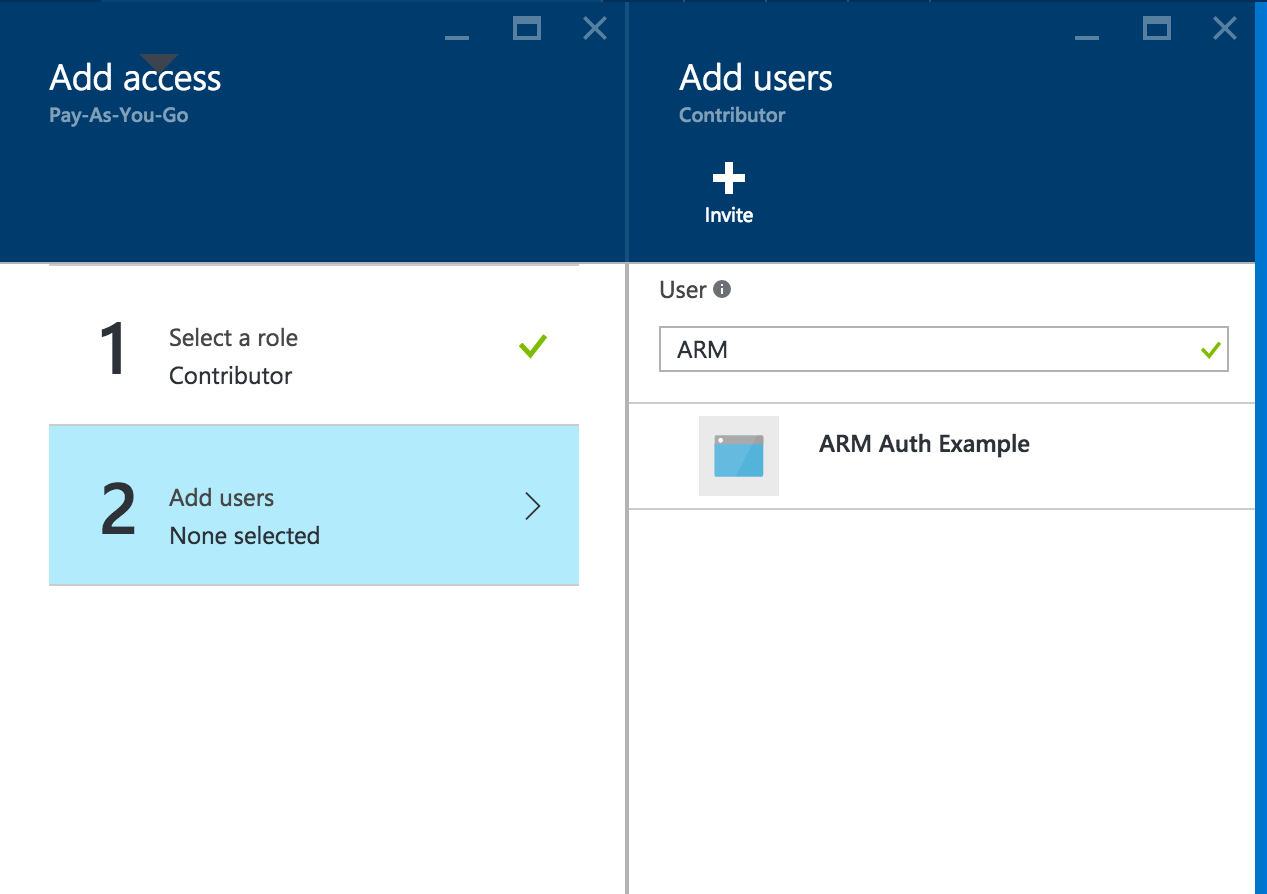 Select Add, and pick the Contributors role. Search for the application.
Initially, the add user pane will only show AD Users in the list, but if you search for the application it will appear.
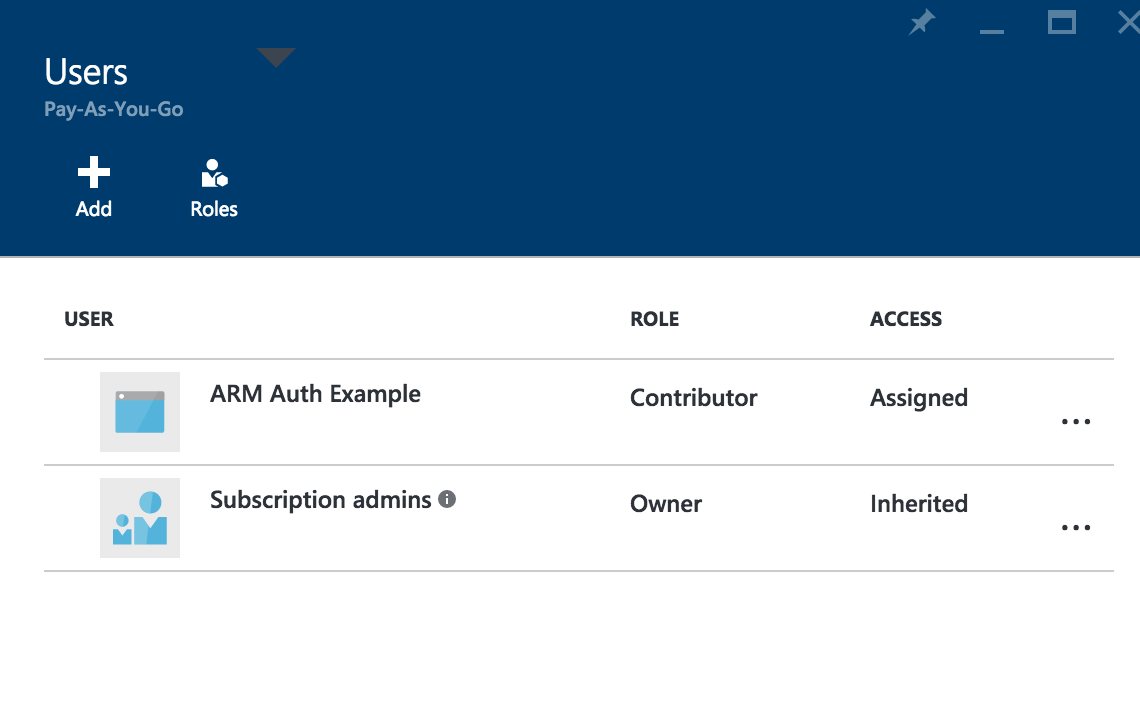 Now the application is has permission to make changes to the subscription.
Authenticating in the NodeJS SDK
Ok, so now we’ve got our application set up to have permission to create resources on our subscription. First, we’ll need to add the azure SDK, and Active Directory Client Library (adal-node), to our project.
npm install adal-node azure --save-dev
And here’s a tiny node program that authenticates with azure, and retrieves a list of resource groups on the subscription.
var azure = require('azure');
var adal = require('adal-node');

var config = {
  tenant: 'exampleoutlook.onmicrosoft.com',
  subscriptionId: 'XXXXXXXX-XXXX-XXXX-XXXX-XXXXXXXXXXXX',
  clientId: 'XXXXXXXX-XXXX-XXXX-XXXX-XXXXXXXXXXX',
  clientKey: 'xDNtQQ0kCxd5Ss+f/j80kbPmk1p4IVcOGRJzV5QR26I=',
};

function getToken (callback){
  // instantiate AD AuthContext with directory endpoint
  var authContext = new adal.AuthenticationContext(
    'https://login.windows.net/' + config.tenant
  );

  // get client access token from active directory
  authContext.acquireTokenWithClientCredentials(
    'https://management.core.windows.net/',
    config.clientId,
    config.clientKey,
    callback);
}

function tokenCallback(error, tokenResponse){
  if (error)
    return console.error('Token Error: ', error);

  // azure helper class for passing credentials
  var credentials = new azure.TokenCloudCredentials({
    subscriptionId: config.subscriptionId,
    token: tokenResponse.accessToken
  });

  // pass credentials to resource management client,
  // just as example; this could be any arm service
  var client = azure.createResourceManagementClient(credentials);
  client.resourceGroups.list(listCallback);
}

function listCallback(error, result){
  if (error)
    return console.error('List Error: ', error);

  console.log("List Success: " + JSON.stringify(result));
}

getToken(tokenCallback);
Conclusion
There are other ways to set up azure resource access for an application, but I like this one because it allows the application itself to manage things without user credentials or intervention. Great for things like custom auto-scaling, or dynamic start and stop of VMs for support customer workflow.
Links
- Back I/O
- Azure NodeJS SDK on GitHub
- Authenticating Azure Resource Manager requests on MSDN
- Create Active Directory application and service principal using portal by Tom FitzMacken, Azure Documentation
- Old Azure Portal
- New Azure Portal