Setting up Apple Disk Encryption
I occasionally find myself needing to attach a new Disk attached to my Mac that needs to be encrypted. I prefer to handle this from the command line, but the diskutil manpage is difficult to sift through to fine the appropriate command.
This technique closely mimics the setup Apple uses if you choose to encrypt your system disk on a new computer.
Core Concepts
- CoreStorage: Apple’s storage engine for managing logical volumes.
- Logical Volume Group (LVG): The top-level construct in CoreStorage, may encompass multiple physical volumes to create a storage pool. Physical volumes must be a partition in the GUID Partition Table (GPT) scheme.
- Logical Volume Famiy (LVF): We don’t necessarily interact with this level of the CoreStorage construct, but it holds metadata about our Logical Volumes, and properties related to disk encryption. You’ll see this level appear in diagnostic about with details about encryption cipher, etc.
- Logical Volume (LV): All the song and dance with CoreStorage, LVGs, and LVFs is to support this concept. Creates a sort of virtual storage device that can then be formatted with a filesystem and mounted.
In this demo we’re just going to have one LVG, with one LVF, and one LV.
Procedure
At the time of writing, I’m running macOS Sierra 10.12.6. Diskutil doesn’t change a whole lot from version to version, so these instructions should remain stable for some time.
This procedure assumes a new disk, or one on which you do not have any data you wish to keep.
Step 0: Prepare the Device
Run diskutil list to see a list of all the devices attached to the machine. For the purposes of this post, I’m using a fresh 8GB USB Flash Drive. The relevant entry in the list looks like this:
/dev/disk5 (external, physical):
   #:                       TYPE NAME                    SIZE       IDENTIFIER
   0:     FDisk_partition_scheme                        *8.0 GB     disk5
   1:                 DOS_FAT_32 UNTITLED                8.0 GB     disk5s1
The important part here is for the next step, is the /dev/disk5. This value will vary by the number of devices you have plugged into your machine, and the order the system attaches them. Ensure you check yours and don’t copy mine.
Core storage requires a GPT partition scheme, and this device is currently partitioned using MBR. If we don’t partition it ourselves, the diskutil cs create command will do it for us, but it will also add a boot partition that we don’t really need since this disk won’t be bootable… wasting 134MB of disk space.
If the device is mounted, eject it with diskutil eject /dev/disk5.
Step 1: Create the CoreStorage Logical Volume Group (LVG)
Note: in the following commands,
csis an abbreviation forcoreStorage. Either subcommand will work the same.
Create the LVG with diskutil. The command format looks something like this:
diskutil cs create <lvgName> <devices> ...
Let’s do that now with my 8GB USB drive:
$ diskutil cs create "Example Group" /dev/disk5
Started CoreStorage operation
Unmounting disk5
Repartitioning disk5
Unmounting disk
Creating the partition map
Rediscovering disk5
Adding disk5s2 to Logical Volume Group
Creating Core Storage Logical Volume Group
Switching disk5s2 to Core Storage
Waiting for Logical Volume Group to appear
Discovered new Logical Volume Group "B8C9F1D8-CF67-4904-8A6C-C53B13CB02C8"
Core Storage LVG UUID: B8C9F1D8-CF67-4904-8A6C-C53B13CB02C8
Finished CoreStorage operation
You can see if created a new LVG and assigned it a UUID. If we run diskutil list again, we see the new partition scheme.
/dev/disk5 (external, physical):
   #:                       TYPE NAME                    SIZE       IDENTIFIER
   0:      GUID_partition_scheme                        *8.0 GB     disk5
   1:                        EFI EFI                     209.7 MB   disk5s1
   2:          Apple_CoreStorage Example Group           7.7 GB     disk5s2
   3:                 Apple_Boot Boot OS X               134.2 MB   disk5s3
I spent some time while writing this, trying to eliminate the
Apple_Bootfilesystem, but was unsuccessful. On larger disks I wouldn’t even consider the 134.2MB of wasted space to be worth the trouble. If anyone has a solution for removing that, leave it in the comments and I’ll update the article.
Step 2: Create the Encrypted Volume
Now that we have a CoreStorage group to work with, we can create a Logical Volume with transparent disk encryption enabled. The format the for createLV subcommand looks like this:
diskutil cs createLV <lvgUUID | lvgName> <filesystemType> <volumeName> <size> [-stdinpassphrase | -passphrase [passphrase]]
The -stdinpassphrase or -passphrase [passphrase] arguments are optional, but we definitely want one of these in our case. These arguments tell diskutil we want our volume to be encrypted. I’m partial to piping my passphrase in with stdin. In this example, I copy my passphrase from my password manager, and then use pbpaste to pipe the passphrase from my clipboard.
If you don’t know what the filesystem options are available, you can get a list with diskutil listFilesystems.
See man diskutil for a detailed exaplanation of the size format options. I just want to fill all available space with my filesystem, so I’m using 100%.
$ pbpaste | diskutil cs createLV B8C9F1D8-CF67-4904-8A6C-C53B13CB02C8 jhfs+ "Example Volume" 100% -stdinpassphrase
Started CoreStorage operation
Waiting for Logical Volume to appear
Formatting file system for Logical Volume
Initialized /dev/rdisk6 as a 7 GB case-insensitive HFS Plus volume with a 8192k journal
Mounting disk
Core Storage LV UUID: 9C83AC99-9AF0-427C-8BEB-D3B6BB50AA65
Core Storage disk: disk6
Finished CoreStorage operation
Running diskutil list once again, I see that it has added a new “virtual” disk at /dev/disk6. This is a straight mounted filesystem that maps to our logical volume, and is where we read an write to interact with our transparently-encrypted disk.
To see details about our corestorage group, we can run diskutil cs list. For the group I just created, it looks like this:
+-- Logical Volume Group B8C9F1D8-CF67-4904-8A6C-C53B13CB02C8
    =========================================================
    Name:         Example Group
    Status:       Online
    Size:         7660331008 B (7.7 GB)
    Free Space:   9916416 B (9.9 MB)
    |
    +-< Physical Volume D6F0F379-9E11-430E-B56B-0AE3A09B84E1
    |   ----------------------------------------------------
    |   Index:    0
    |   Disk:     disk5s2
    |   Status:   Online
    |   Size:     7660331008 B (7.7 GB)
    |
    +-> Logical Volume Family 1F185A56-CDFC-4651-BB7B-719139E4676E
        ----------------------------------------------------------
        Encryption Type:         AES-XTS
        Encryption Status:       Unlocked
        Conversion Status:       Complete
        High Level Queries:      Fully Secure
        |                        Passphrase Required
        |                        Accepts New Users
        |                        Has Visible Users
        |                        Has Volume Key
        |
        +-> Logical Volume 9C83AC99-9AF0-427C-8BEB-D3B6BB50AA65
            ---------------------------------------------------
            Disk:                  disk6
            Status:                Online
            Size (Total):          7298088960 B (7.3 GB)
            Revertible:            No
            LV Name:               Example Volume
            Volume Name:           Example Volume
            Content Hint:          Apple_HFS
You can see the details about the encryption settings in the Logical Volume Family section.
Unlocking the Volume
If the device is locked, perhaps after a reboot or when moving to another computer, you’ll need to provide the passphrase to unlock it. Here I’m piping the passphrase in from the clipboard as I did when we configured the volume.
$ pbpaste | diskutil cs unlockVolume 9C83AC99-9AF0-427C-8BEB-D3B6BB50AA65 -stdinpassphrase
Started CoreStorage operation
Logical Volume successfully unlocked
Logical Volume successfully attached as disk6
Core Storage disk: disk6
Finished CoreStorage operation
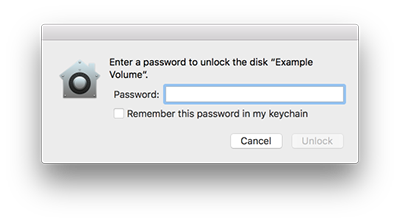
When reattaching the device manually, you may be prompted for the password through a graphical dialog. This prompt also gives the opportunity to save the password in your key chain so that you won’t need to enter it again.
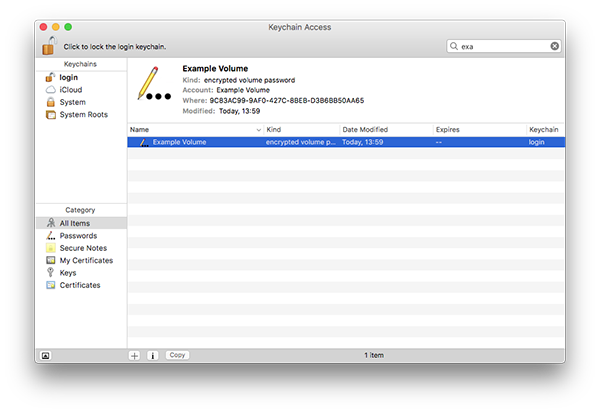
Any saved keys on your system will appear in the Key chain Access application as an entry of kind “encrypted volume password”. From here you can delete the remembered passphrase, or retrieve it if you’ve lost your copy of it elsewhere.