Improved Servo Couplers
Sawppy’s original servo horns came with tiny screws, which tended to pull out of the plastic servo horn. The bill-of-materials suggests to use a longer screw, but McMaster wouldn’t ship to Canada for personal orders… and sourcing a local part proved too difficult (or expensive).
I initially decided to go without, and used the screws that came with the LX-16A servo motors for Start. During assembly, it seemed quite obvious that there wasn’t enough grab in these screws, so I ordered aluminum 25-tooth servo horns from Amazon.
I left the original screws in at first, since I already had everything assembled… but after a few driving sessions with the finished rover, it became obvious that these screws were going to be a problem.
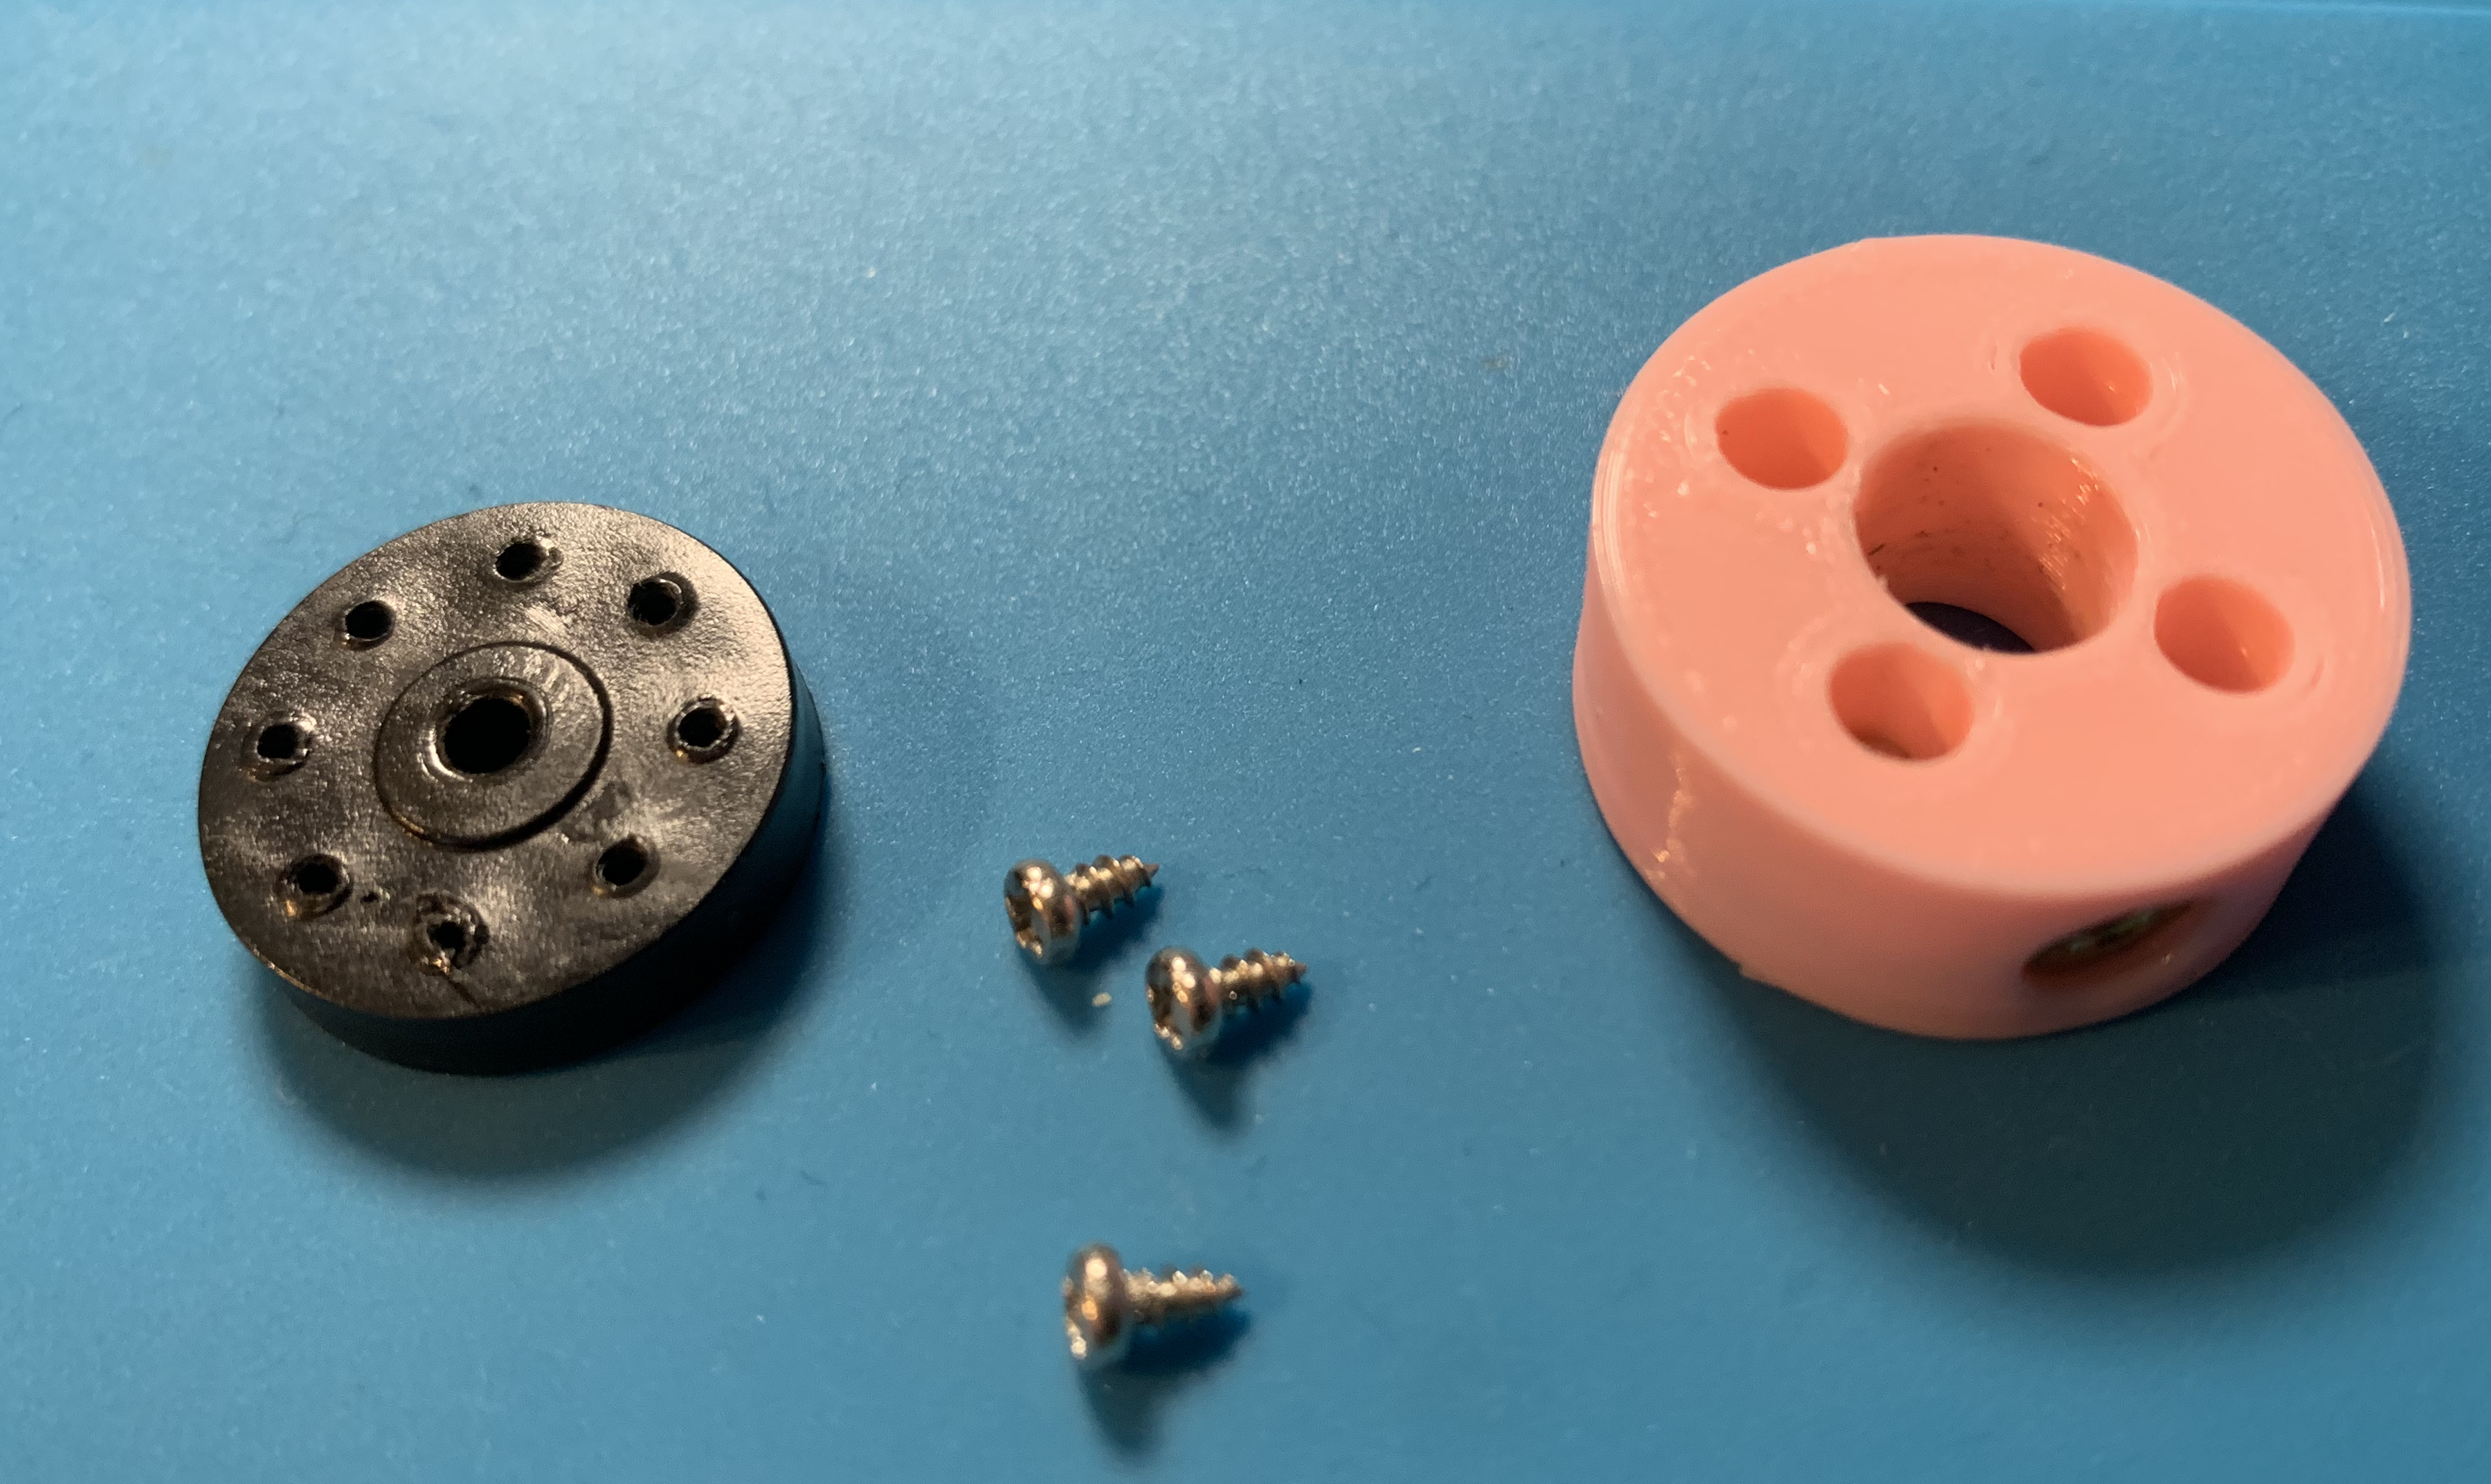 Original Sawppy couplers where screws pulled out of the servo horn.
The original Sawppy coupler wouldn’t work with my metal servo horns, because they have a 4-hole pattern, tapped for M3 screws. I would need to modify the holes from the original part for these much larger screws.
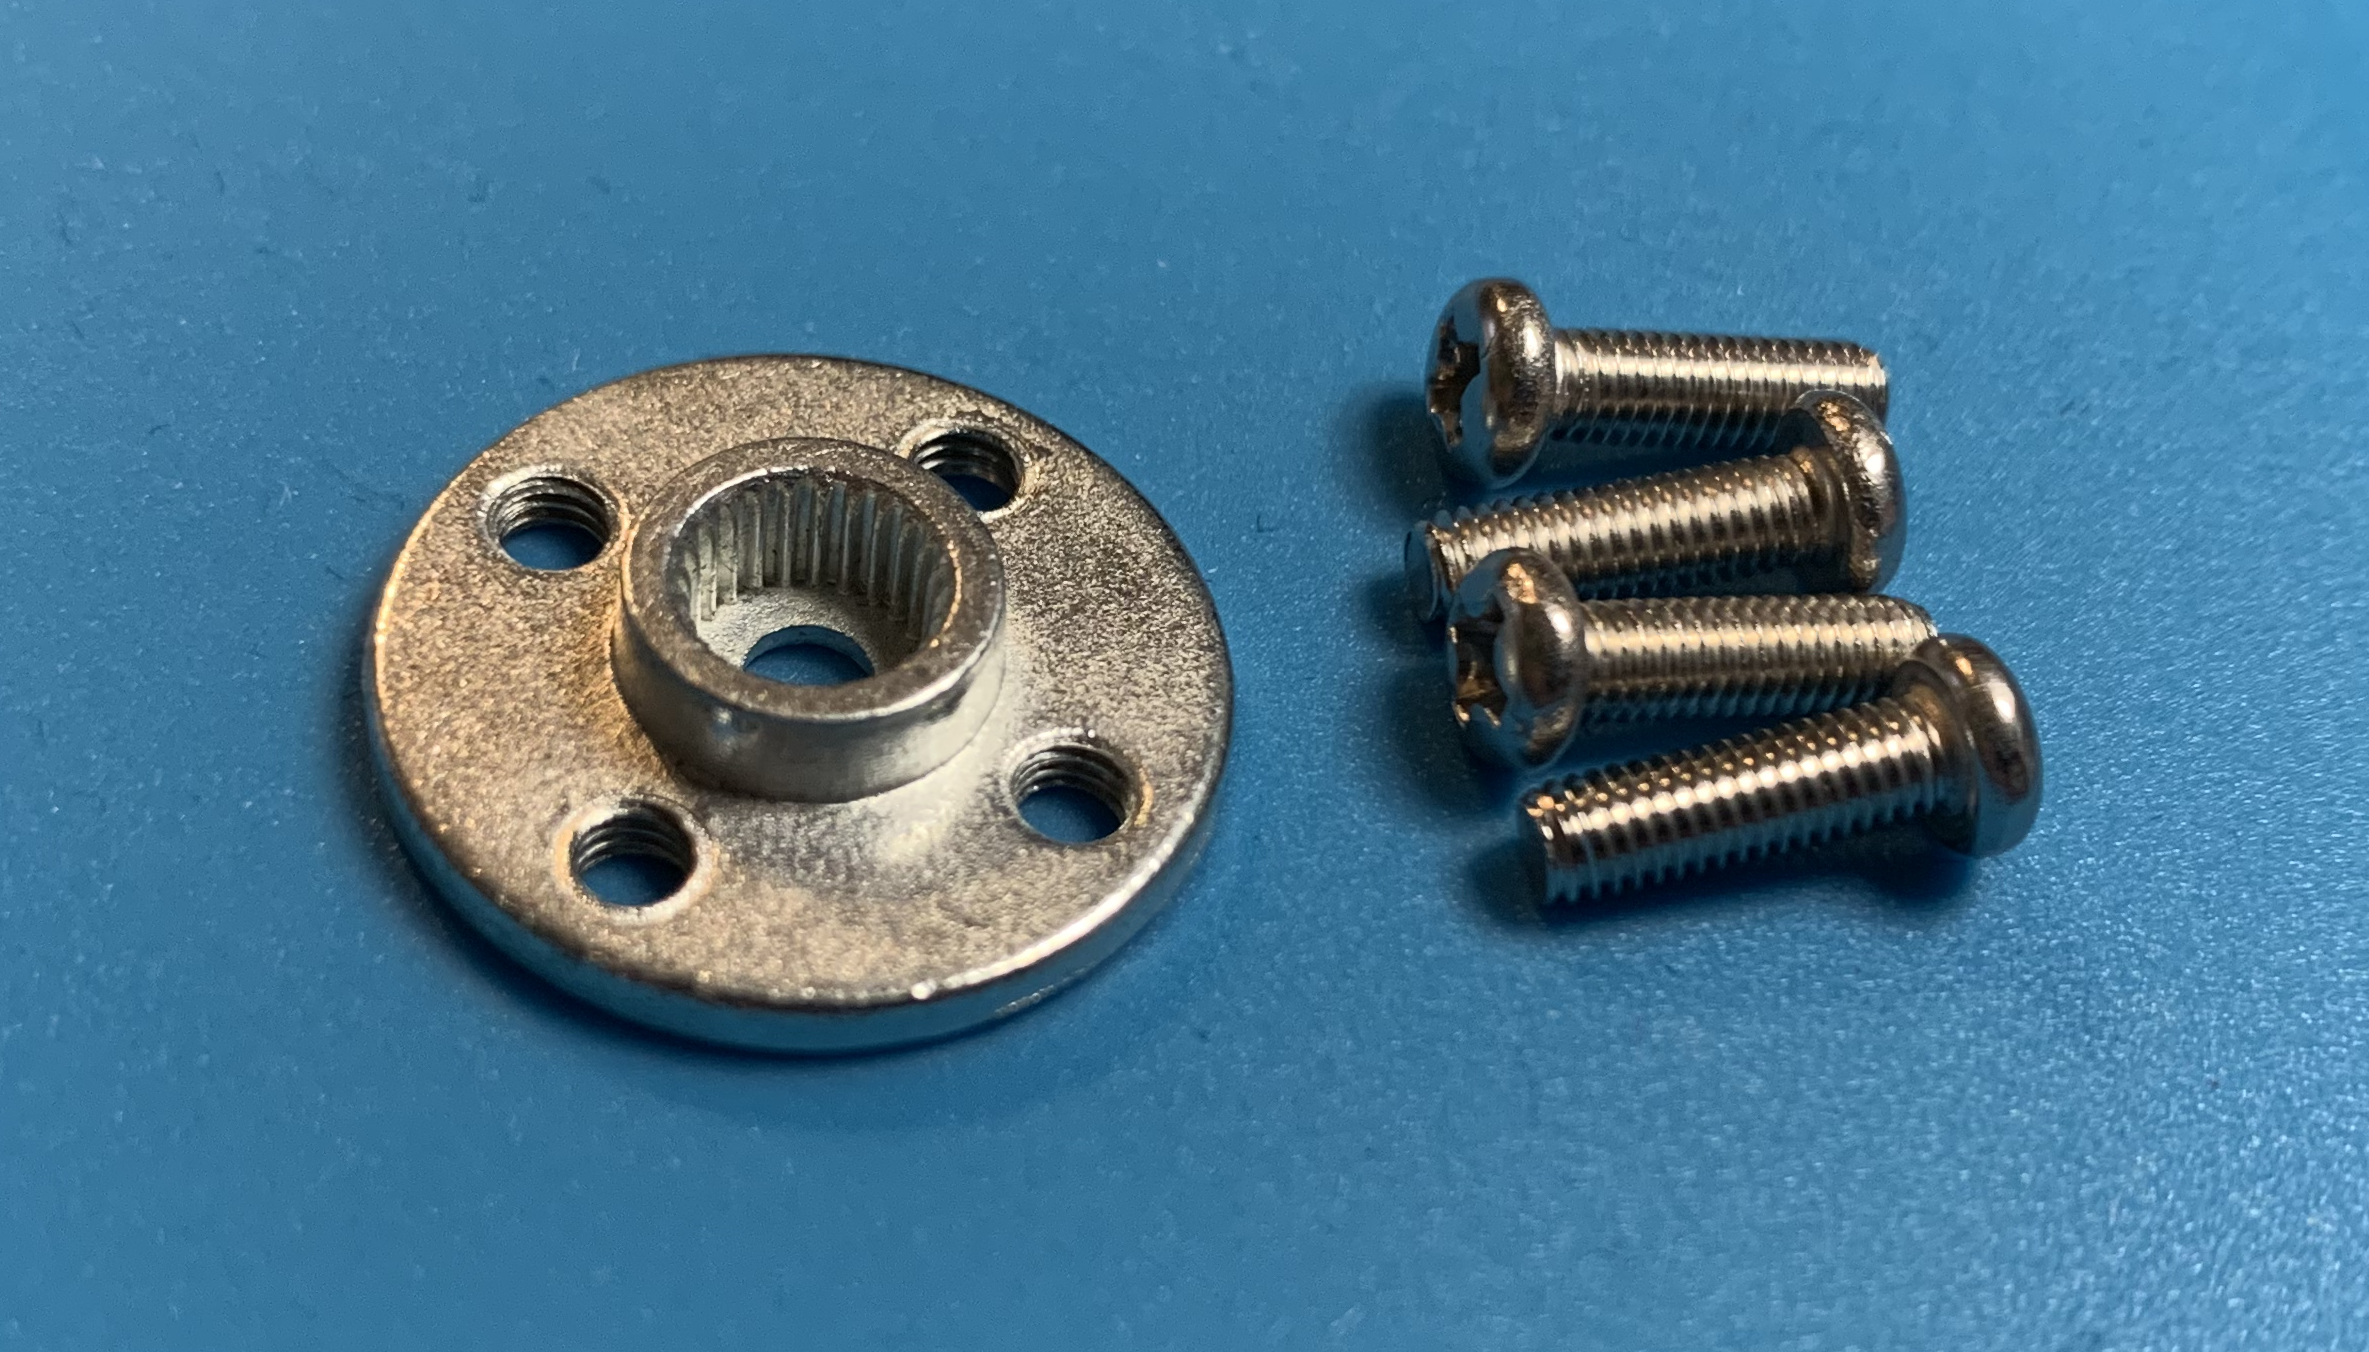 Aluminum servo horn.
The main issues I had to solve in my replacement part were:
- the footprint of an M3 screw is wider than the original’s screws
- the 8mm shaft that this is coupling to significantly limits the space available for the screws
- the wall between the threaded insert and the screw holes is very thin
- all the M3 screws I had were rather long, so the coupler needed to “use up” a large portion of the screw’s length
I’m not going to try to document the whole CAD design process here. I’ve gotten pretty comfortable with OnShape - the web-based CAD design suite that Sawppy was built in - so I didn’t have too much difficulty turning my idea into a working part.
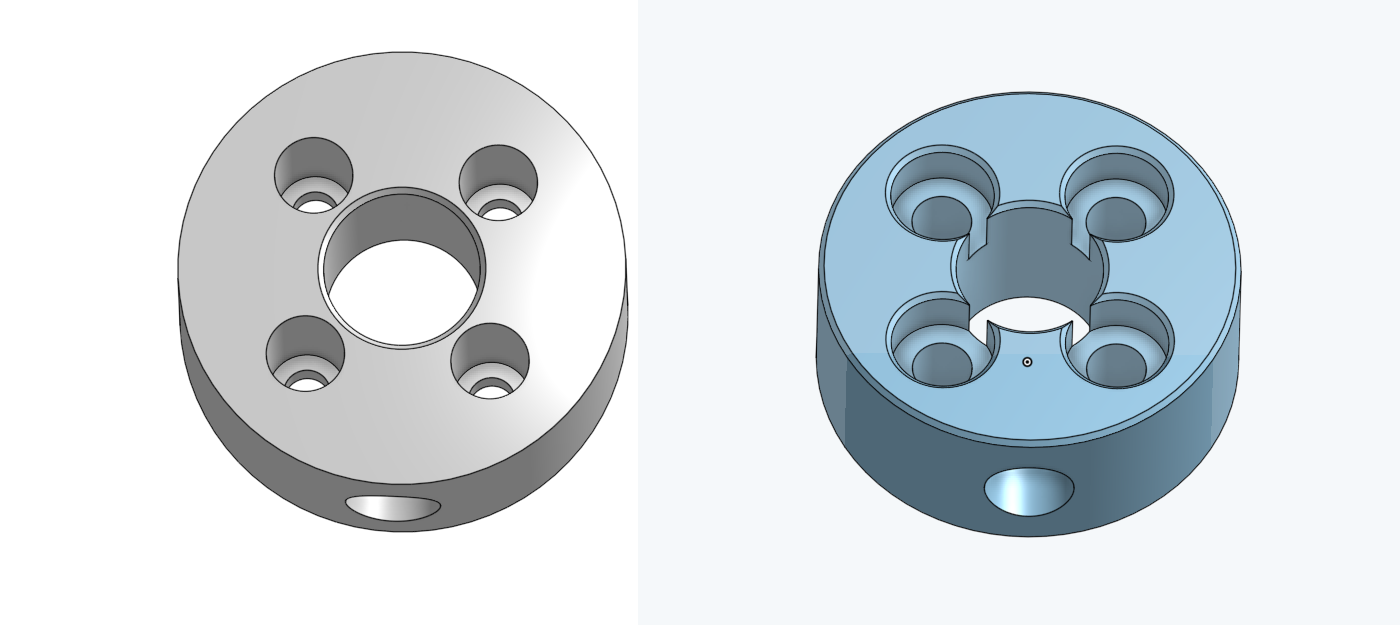 CAD render of original coupler (left) and my version for the metal horn (right).
Really, the most challenging part of this design was that there are so many holes in such a tight space, that every dimensional constraint has a risk of overlapping with another.
If the top holes that allow for the screw head are any narrower, then the head wouldn’t fit. If the same part of the hole were any deeper, then it would intersect with the sideways hole for the thread insert.
This crowding is not significantly worse in my version than the original was. I had noticed this in practice with the original… If the threaded insert was not inserted perfectly straight, it would warp the screw holes. This sometimes made the screws difficult to install.
However, this risk of the head holes overlapping significantly with the insert does mean there is a minimum length for the screw, or it won’t reach the threads in the horn.
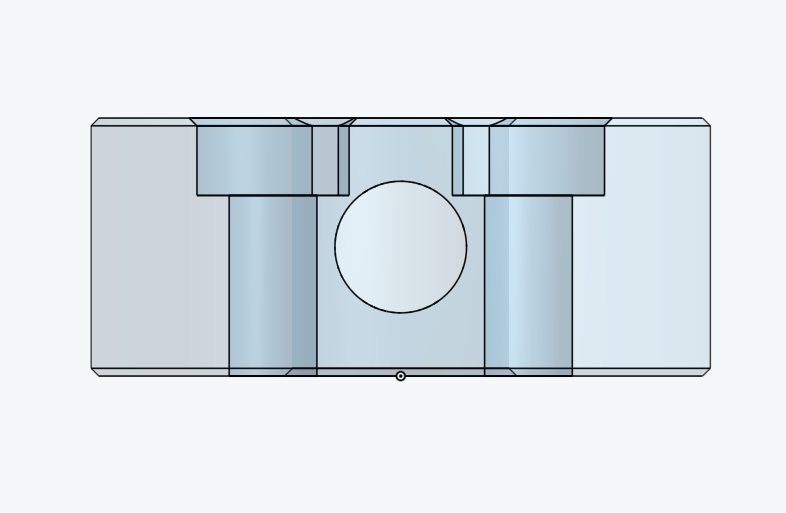 Transluscent view from the edge shows the crowding of the screw holes and the threaded insert.
If the center hole for the shaft were smaller, the shaft wouldn’t fit. So I had to live with the unsightly intersection between the holes for the screw head and the shaft. Fortunately this seems to be mostly a cosmetic issue, and shouldn’t affect the performance of the part.
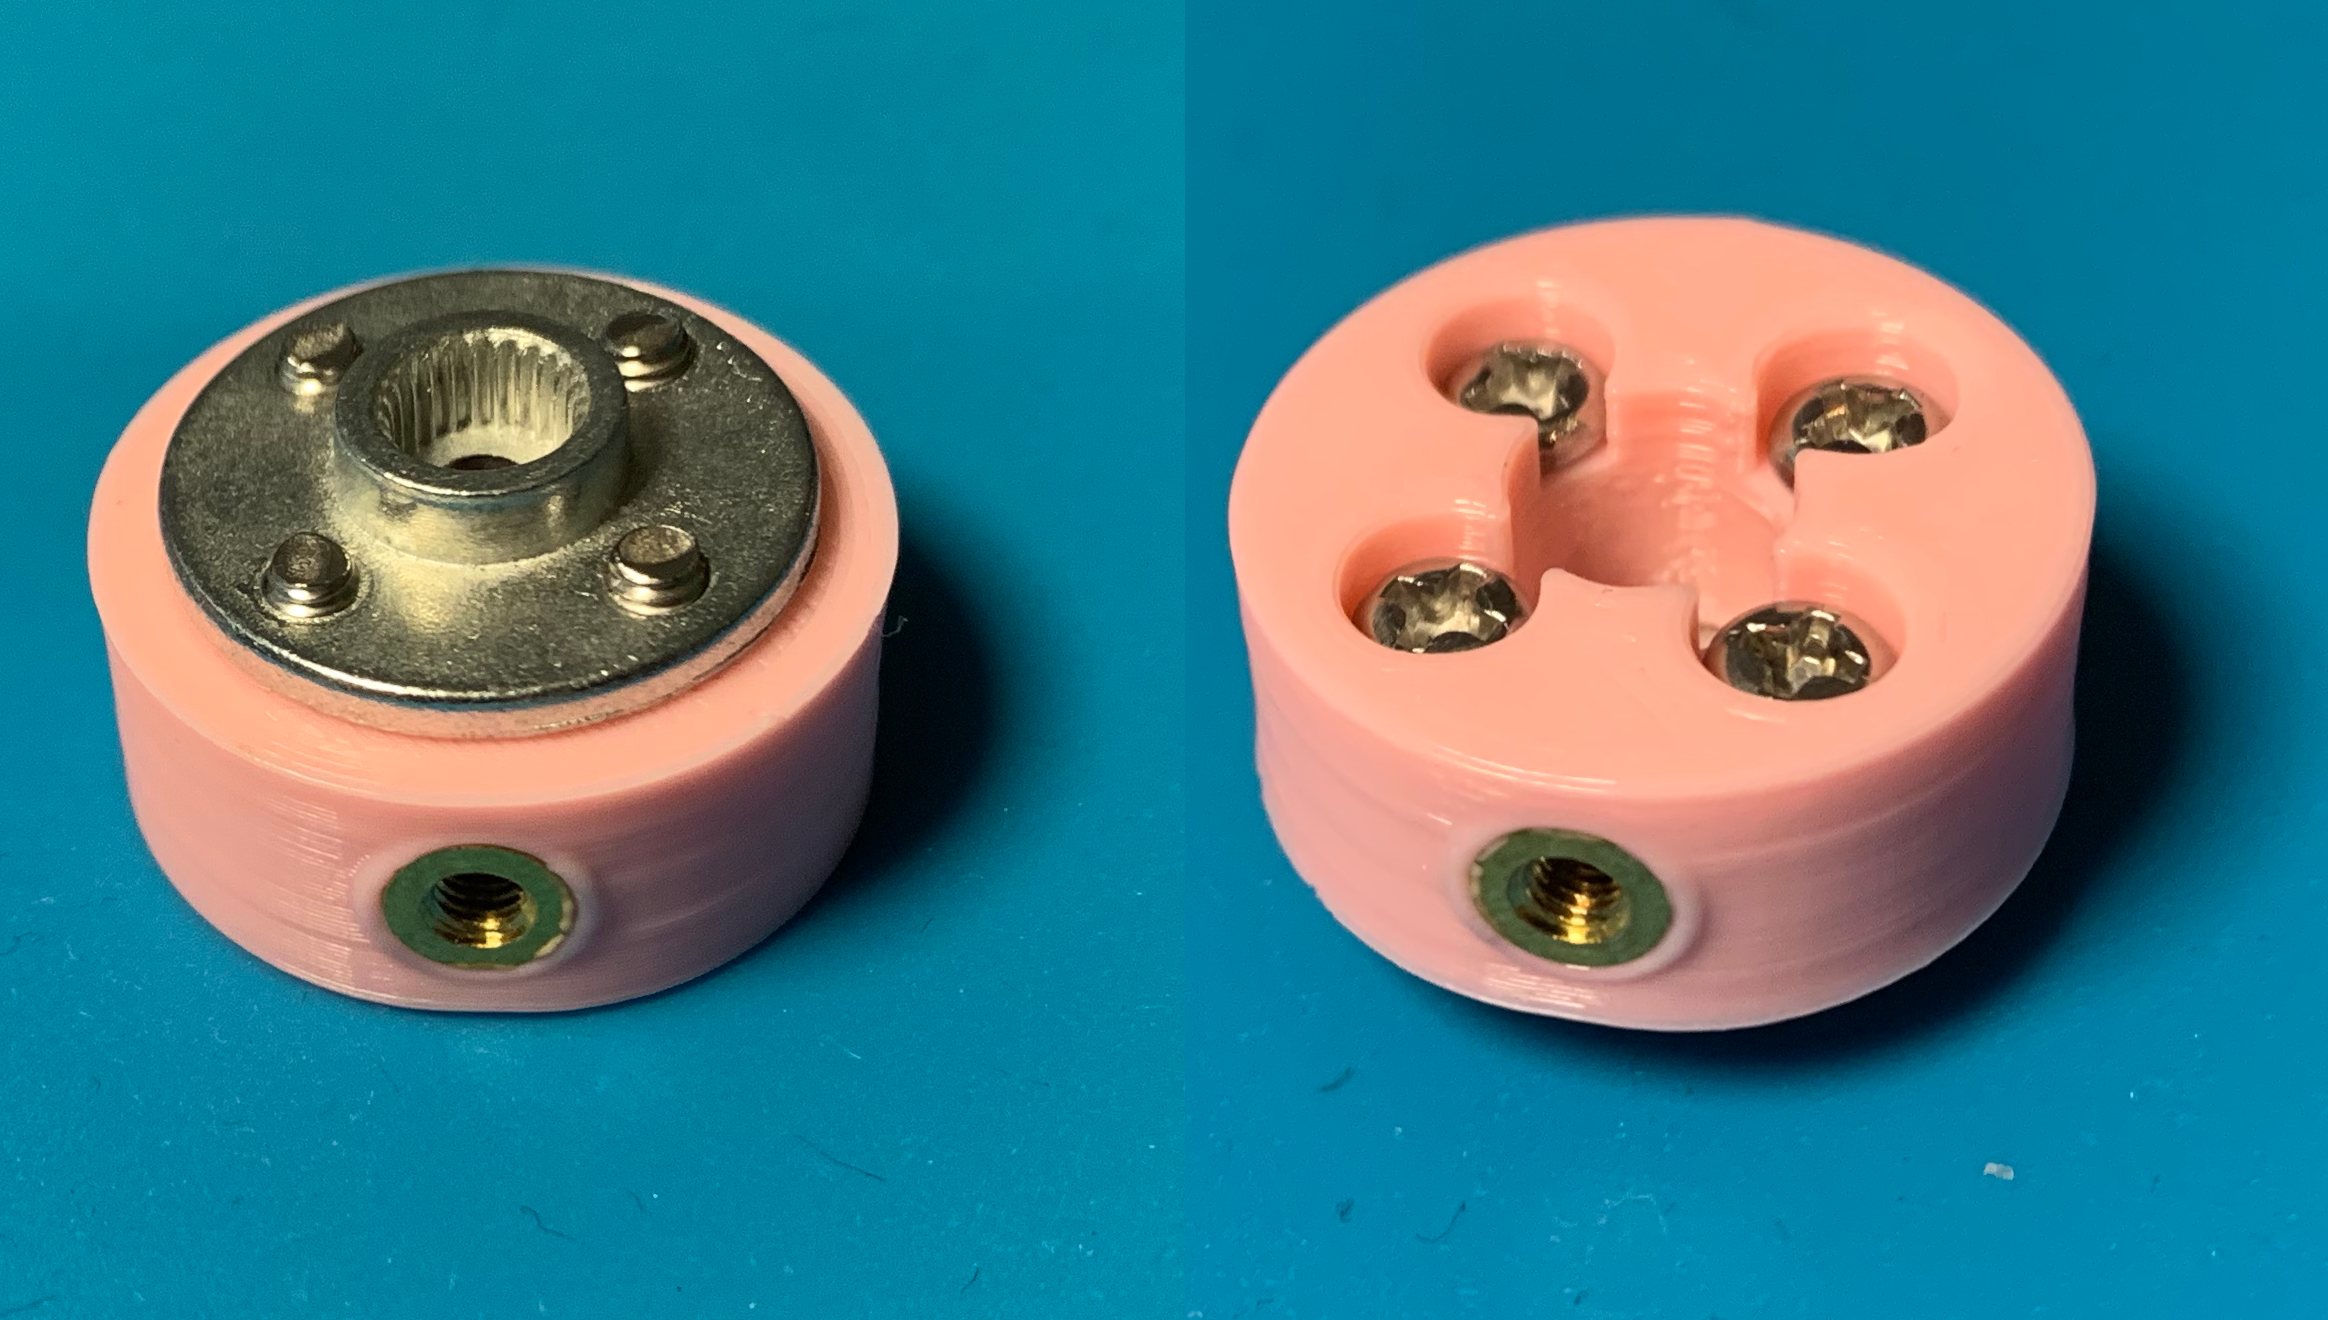 Finished part with screws that came with the aluminum horn.
The screws that came with the metal servo horn were pretty much the perfect length for this application. I’m not a big fan of phillips heads because they strip easily, so the design accommodates the hex socket screws that I used for the rest of the rover.
The socket headed screws actually look very nice. They sit flush with the top, which I hadn’t actually planned for, but was very pleased with. But the 8mm screws are a tiny bit short, so only a little bit of the threads grab into the horn.
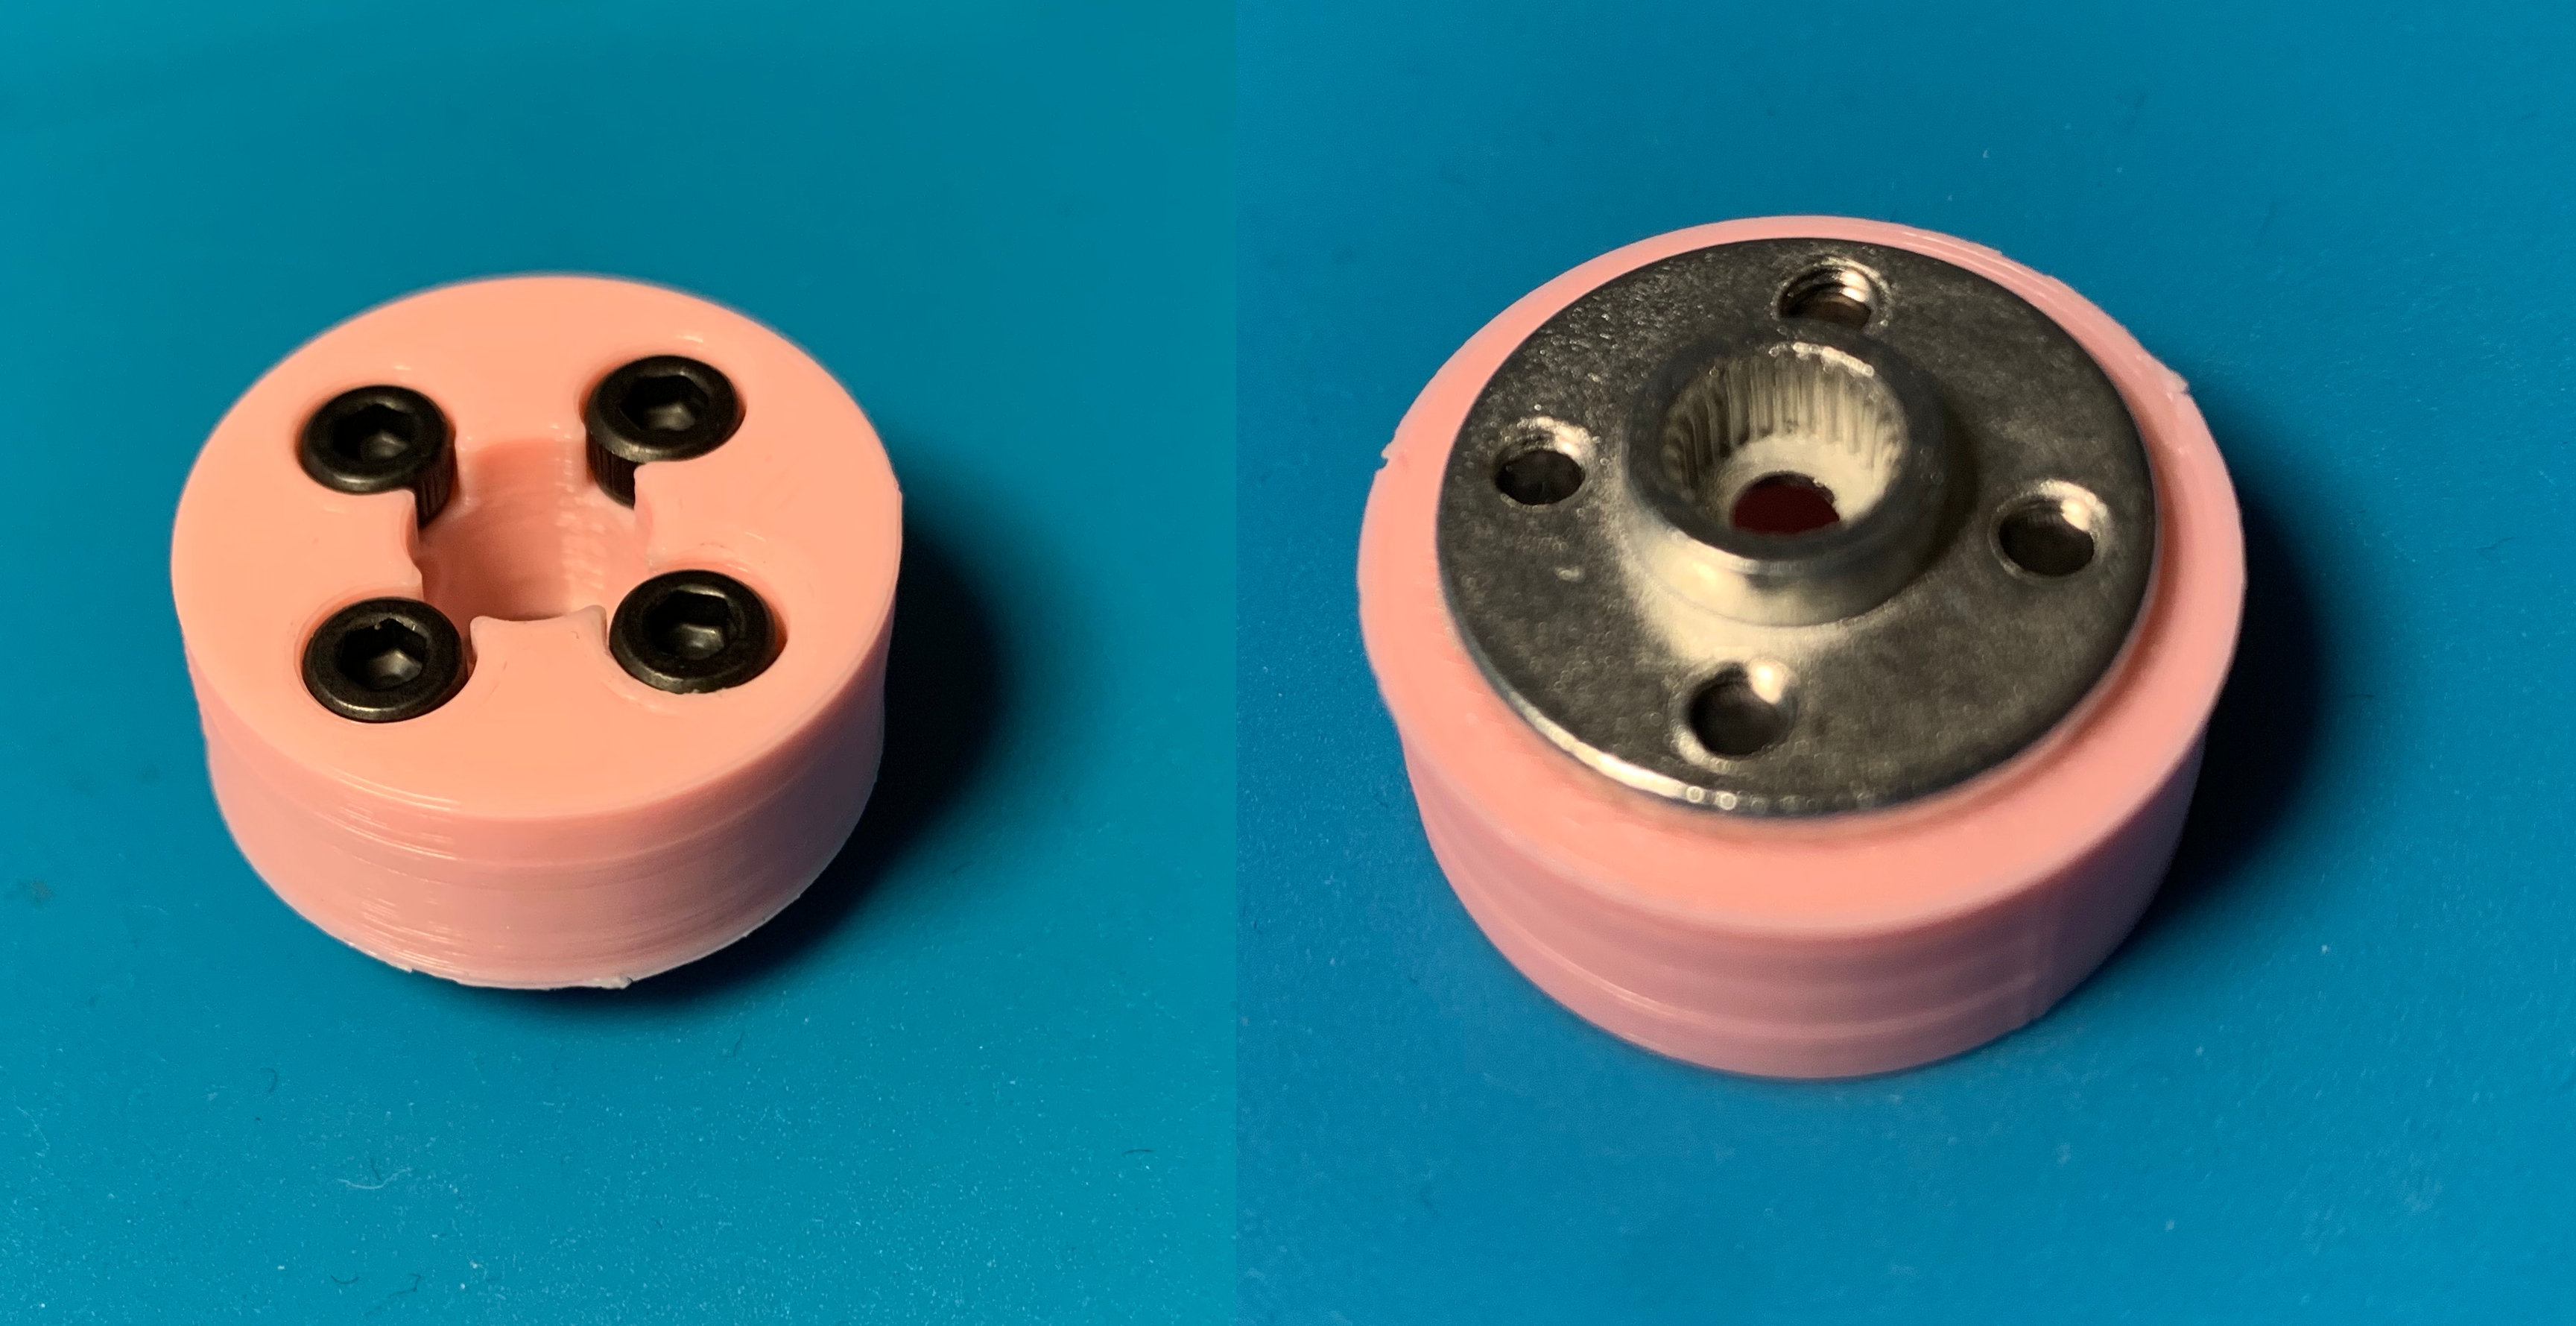 Finished part with black alloy hex socket screws.
Overall, I am very happy with the results for this part, and I’m looking forward to seeing how they perform while the rover is driving around.